New Header~

Blogging has opened up a whole new world for me. I have not only met interesting people along the way but have found a wealth of decorating advice and inspiration. Technologically it has been a huge learning curve, learning how to link up to a party, add photos, "customize" your blog with widgets, learning what a widget even was, adding Linkwithin, etc.  What I appreciate is that all those amazing bloggers out there who are or were in the same boat as me, willing to share not only their projects but are willing to share the ins and outs of blogging.

This week Funky Junk Donna (another great Canadian) gave some great tips on improving your blog and navigating your way through uncharted blogging territory. I took a brave step and have created a new header for my blog. The photos are branches of a tree by my front door taken against the afternoon gray sky after a rain fall. Living on the west coast you tend to live with gray skies as it rains quite a bit here. It can take its toll on you, it can begin to feel dreary. I have tried to see the beauty in the gray and love how the bare branches look against the gray sky. I am not one to use cutesy fonts with scrapbook pages filled with doilies and lace. I like pure design and the graphic elements that can be found in nature such as with the shape of trees, movement of water and the outline of the mountains I see from my home office window. 


What I want to know is how to do you like my new header? 


Favourite China~

While I am waiting for the paint to dry in the laundry room I thought I would write a quick post. My mother-in-law (oh, and my father-in-law, can't forget him, I hope that improves the "good daughter" points, a family inside joke) read my blog quite faithfully. She is a brilliant woman and quite a wordsmith so I am always making sure that my posts are as grammatically correct as they can be. She gave me several suggestions on what to write about and one of them was about my beautiful Czech blue onion china


A little historical note: The porcelain is called "blue onion" but there are really no onions on the dishes. The design has Asian influences as there are pomegranates, bamboo and Asian flowers in the design. The porcelain design began around the same time china was being produced in Europe after the Europeans discovered the Chinese way of in-glazing cobalt. This particular pattern has been around for about 200 hundred years and original pieces are quite valuable. If you want to read more this website has some great information.


My Czech grandmothers started collecting this china for me when I was about 10. My sister and my cousin were both lucky to receive sets also. I have been s-l-o-w-l-y adding to the set over the years. Every time my parents head to Prague my fingers are crossed that a new addition will make its way over the ocean and into my cabinet. My plan is to set the table with my china and the wonderful antique silverware my husband inherited from his grandmother, Grandma Mary, and then take some photos.


 My mother-in-law was fortunate to inherit some antique Chinese rose medallion porcelain and Canton blue Chinese china (which I absolutely love!) from Grandma Mary.


Photo: http://aarf.com/fecant98.htm


 I love the intricate designs and shapes of her dishes. When we toured Mount Vernon, George Washington's Plantation in Virginia, we discovered that he ate from the same Canton dishes! You can read more about those dishes here.


Monday Morning~

I had big plans today - I was going to get some custom mats cut for two pieces of artwork my children painted and the Joseph Minard's Napoleonic War chart I bought my husband for Christmas. I hit Ikea and Michael's last week for some inexpensive frames. 


But luck would have it that my son comes home from a hockey tournament with the stomach flu, which means I am hanging around home today. 


Maybe I should tackle some projects I have been procrastinating on? I might paint my laundry room with leftover paint. I think it needs some improving -it is too peach for my liking. It is one of the last rooms in the house I haven't painted.


Stay tuned....

Shopping with my Sister~

It seems that the last two Tuesdays my sister and I have gone shopping. Not mall shopping but home decor shopping, my favourite thing to do. My sister is slowly fixing up her  80's townhouse (which has gorgeous vaulted ceilings and a yard almost bigger than mine) on a limited budget.


 Enter sister (me).


 I find that when there are budget limitations my creative juices start flowing. I LOVE creating an esthetically pleasing home but when limited funds are an issue it almost becomes an obsession. Sometimes I wonder if I am crazy as I lay awake at night with the ideas flowing through my brain. 


My sister is trying to spruce up her master bedroom and her girls' bedroom. I have introduced Odeedoh to my sister for inspiration. I love that they feature rooms that are creative, simple, budget-friendly and not pretentious.


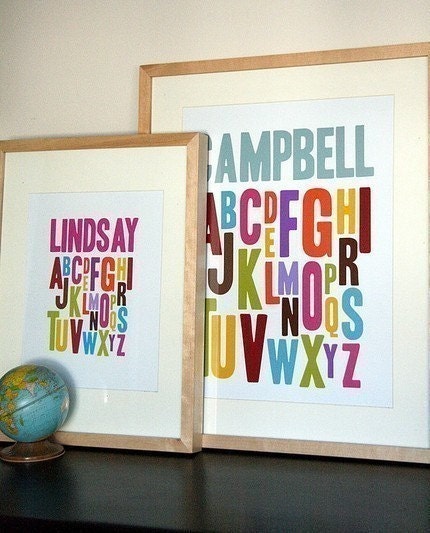
I can't help myself but get involved when someone else is re-designing a room or their house. I must have a disease. So I wanted to add a bit of style to my nieces' room. For Christmas I ordered a personalized print from Penny People Designs (another cool Canadian who not only runs a successful card/print business but has amazing design sense which she demonstrates in her home renovation). You can read about that post here.


Photo: Penny People Design


 I also got the ball rolling by making my oldest niece baby bedding with Amy Butler fabric. I then suggested my sister take her wobbly Ikea bookcase, paint it white and add beadboard to the back to give it support, which she did. 


Did I mention it was a brilliant sister's idea?


She is now looking at bedding and drapes for the room to coordinate with the Amy Butler fabrics I used to make the bedding.


Photo: Amy Butler Design


For her master we had fun at Homesense, Ikea and Fabricana (a Vancouver area fabric store). She had purchased a super king duvet (my brother -in-law and my sister are quite tall) and thus needed a super king cover. In order to save some $$ I suggested she buy 2 king sheet sets. She can make a duvet out of the 2 flat sheets and then have 2 fitted sheets and 4 pillow cases. We bought 2 sets of 600 thread count in a white cotton for $120!
 If the flat sheets aren't big enough for a duvet I suggested that she can insert some grosgrain ribbon to make it wider or longer. 


Another brilliant idea from a brilliant sister.


 We also bought some Amy Butler fabric to make throw pillows (using down pillow inserts from Ikea - $6 each) for her bed. We only needed 60 cm of each fabric plus 1.2 meters of a coordinating blue cotton. Cost: $28- not bad for 2 throw pillows and extra for some wall "art". She knows her husband will have a comment about the pillows though. He finds pillows fussy and in the way, I shake my head in disbelief, he and my husband are cut from the same cloth. Mine has learned just to shove them over to my side of the bed. 


Now my sister can head over to our parent's place to escape Vancouver during the Olympics armed with sewing projects. Our mom is the queen of sewing. She taught me all I know. 


Our Her plan is to make a headboard for the master, curtains for the girls' room, find some cool thrift store lamps like mine and hang up prints on the walls. She wants to frame the Amy Butler fabric with a large frame and mat. We She  already did that for the girls' room. 


Love this headboard via Domino files at Flickr


Can't wait to see how it all turns out. 

DIY Memory Board~

Since I don't have any projects on the go at the moment I thought I would share a memory board I made for my youngest daughter (who isn't so young - turning 14 in 2 months!) a few months ago in my pre-blogging days.


I had a cork board in storage that I had recovered in gingham several years back. One lazy morning after rummaging through my leftover fabric bin for something to do (do you ever do that?), I decided to take some leftover Waverly Black Onyx fabric that I had used to make throw pillows to recover the cork board. 


I also have meters of black grosgrain ribbon, so I thought why not a memory board?
 Using a staple gun I stapled the fabric to wrap around the board. I cut the fabric about 2 inches bigger than the cork board to allow for the fabric to overlap. 


Next I laid out the ribbon diagonally over the front and stapled the edges on the back. I also had in my sewing bin some upholstery tacks to tack where the ribbon criss-crossed. 


To hang up the board I stapled fabric hangers so I could attach the board to the wall. 


Didn't cost me a cent and was quick, easy and cheap! 


I am going to link up with:


Hockey Night In Canada~


I don't know if anyone one out there can relate to my life....


 ....it is perpetually hockey night in Canada at my house. I love to look at all the pretty rooms that are posted on various blogs and sigh when I come down the stairs. My decor-challenged husband (and son who doesn't fall far from the tree) are ALWAYS drying their hockey gear in the living room. No - not hidden around the corner but right at the entrance where all can see and smell


The icing on the cake is that my lovely lamp that everyone loved (and left wonderful comments) was relegated to the garage! My husband can't stand it. Sometimes he just can't see the beauty in things, if he gets it into his head he doesn't like it, well, I lose.


 I will have to sneak it in somewhere else. Maybe my oldest daughter's room?


But one battle I did win: the bikes are FINALLY out of the house!


YAY!

Fabulous Find and a Dresser Re-painted


I repainted my daughter's dresser about month ago. I bought this dresser about 16 years ago before my oldest daughter was born for $10! It came with a shelf hutch but I recently left it on the curb with a big "FREE" sign.


~Yes - that is my son who insisted that he needs to be in the picture with his light sabre~


~before~


 It has been painted several times over the years, first a dark blue with colourful knobs and then white with pink crystal knobs. My youngest daughter, who will be 14 soon, has the dresser and wants it gone. Sometimes my family doesn't appreciate my need (it is like a disease - I can't help myself) to fix up the old. I am searching for a dresser taller in height but for the interim I decided to re-paint it yet again with a lovely soft pale green. I wanted white crystal knobs but didn't want to pay the $6 each price tag (I would need 9) so I opted for brushed nickel knobs.  


The icing on the cake was as I was wandering around Winners (TJ Maxx in the US) I found this great mirror hiding behind some paintings. Either I discovered someone's hiding spot or it was just placed there. It was exactly what I was looking for! 


Now all I need to do I re-paint her bed OR try my hand at making an upholstered headboard. 


So many things to do, so little time.


This dresser is going to visit:


The Midas' Touch: Another Thrift Lamp Makeover

As promised I am showing you what I did with this second thrift store lamp. 


This one cost me $5.99. 

I loved shape of this lamp as well and decided not to spray it white like I did with this one but to really glam it up with some silver leaf. I  could of spray painted it silver but want the aged patina that silver leaf can achieve. I remembered that my mom gave me packages of antique silver leaf along with copper and gold. I decided to give it a whirl. How hard can it be? 

Off to Michaels I went and bought some Metal Leaf Adhesive Size, it cost $4.99. If I was more prepared I could of brought in my 40% off coupon and save me a few loonies. You could get the glue in a spray but that was $11.99 and then it would be hard to control where you want the glue to be on your object.

The next step was to spray my lamp black. I wanted the black to show through the silver. I used Rustoleum's Painter's Touch semi-gloss in basic black. 


After I dried the lamp overnight I was ready to cover it in silver leaf.

 Before you start you need to shake the glue.  Using a paint brush I applied the glue to the lamp base being careful not leave puddles and globs of glue.  I chose not to cover the bottom "plate" and the top "neck" of the lamp.The instructions said to wait about 60 minutes until the glue went from white to clear. It only took about 30 minutes. 


The next part was the fun part. You will need a CLEAN soft bristle brush. All my kids wanted to "help". This is the messy part as silver dust is everywhere. You take an individual silver leaf and lay it in the surface. With your brush smooth it out. 


Take another leaf and lay it beside overlapping slightly. You might think to  yourself, "won't you see the edges of the leaf ?" This stuff is amazing, after laying down leaf upon leaf and brushing it out, they all blend together so nicely. If there are patches that need filling just take a small piece of the leaf (they are incredibly thin and easy to break apart) and lay it down. Brush it smooth with your brush. Silver leaf is VERY forgiving. 


Once you have covered the whole object do a final sweep with your brush over the surface. At this point you can spray it with a laquer or varnish to seal it or just leave it alone. I love the whole aged and worn look so I chose not to seal it.


Now I have a fabulous lamp. 

This poor lamp was kicked out of the entrance way though - my husband (who thinks he knows how to decorate) thought it was too visually cluttering. The lamp is now on our bedroom dresser. I bought a drum shade at Walmart and a lamp harp at Home Depot. Not sure about the shade though (that is why the plastic covering is still on), I may find one that is longer in the height to give it a more balance look. What do you think?


~I love the black showing through~ 


Ta-da!

This lamp is going to join the other amazing projects at:

and
and
and
and
and

Creating a Beautiful Rental Home: Last and Final Tip ~

Tip #8
Don't be afraid to use a bit of elbow grease...

Image from www.delight.com
 to clean and tidy both the exterior and interior of a home. I have not hesitated in fixing up the flower beds, adding a garden and sprucing up the lawn. I have gone out to buy planters, outdoor lighting and patio furniture. You can always pack it up and take it with you! I have also scrubbed and cleaned grout, tiles, walls, doors, windows and the list can go on. I am not afraid to roll up my sleeves and get down to work. 


A home is an expression of you, don't let it scream that you don't care.


I hope that throughout the year I can show you what I have done around our rental to make it a home, maybe inspiring you along the way. 


This week I hope to share a dresser re-do, awesome finds and another thrift store lamp makeover!

Creating a Beautiful Rental Home: Tip 7~


Tip #7 
Accessorize!


 It is a great way to personalize a space. I use throw pillows, artwork and mirrors. Accessories are a great way to add a pop of colour if you aren't allowed to paint the walls in your place. 
You don't have to spend a lot on accessories. Ikea (I am sounding like a broken record), Homesense (Homegoods in the US), Target (if you live in the US or are like me and live close to the border),  Loblaws/Superstore and even Walmart carry throw pillows, lamps, artwork, frames, etc.


One way I instantly personalize our space is by hanging up artwork


I know you are thinking "what about the holes?" I have never had an issue, most landlords paint after you leave OR I fill in the holes, patch them and paint over ( a good domestic diva always saves her paint!)


 Use what you have. 
I love using my children's art around the house, items in shadow boxes, photos that my husband has taken on his travels,  art purchased on various trips, family photos or even posters and maps that I have framed. My latest purchase is a poster my husband wanted, it is the graph of the Napoleonic advance into Russia in 1812, can't wait to frame it and hang it up.


Photos taken by my husband in Paris hanging in a daughter's room in old frames I spray painted black.


Artwork painted by my oldest daughter in art class in a Ribba frame from Ikea.


Nail from Jamestown, VA in a shadow box from Homesense.


I also love hanging up mirrors. They visually expand a space.


Pillows are another way to add warmth and coziness to your space.
(I love making pillows).


PIllows made by me.

Patterned pillow from Pottery Barn outlet


More pillows made by me (down inserts are from Ikea-only$6)


Come back tomorrow as I share my last tip. This week I am also going to show you what I did with this second thrift store lamp I found!